Search for answers or browse our knowledge base.
Manage Our Users; User Registration, Activation and Deactivation
To use IWDR, one must first Register. Once a user is registered, they still will not be able to use IWDR until their registration is activated by someone who has an Admin capability for the organization. The admin user has the ability to ‘Manage Our Users’ for the organization and must approve access to the newly registered user, approve and set the functionality for the user. This will enable the admin to approve additional users and assign them the functionality needed within the organization. Contact support@iwdr.org if you do not have anyone in the organization with the admin capability to add users.
To begin:
How to register a new user:
1. The new user must be registered.
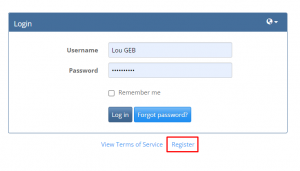
- To register, click on the [Register] link on the bottom of the IWDR Login page at https://iwdr.org/beta/login.php
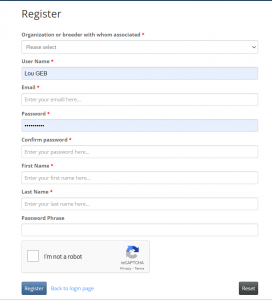
- Fill out the form that pops up.
- It is especially important in the first field to select the entity (Organization or Breeder) for which the new user is to be affiliated.
- Currently, we don’t have the email being sent to you to notify you that they have entered a request to have a login, therefore they will need to email you to indicate that they have registered. It may be easier to choose your email address as your user name as that is also what is used in the IWDR Website for the user name. You can also make the passwords the same in both sites, however if you change the password in one site, that change is only affecting the particular IWDR site you are changing it in (IWDR Database or IWDR website). Some organizations may choose to set it up automatically as part of the onboarding process, and so the admin user will set up a username to be used and a temporary password and the user can change later.
- Once done filling this information out, Click the [I’m not a robot] box.
- And then finally, click the [Register] button.
- Have the user notify you (or the admin user for the organization) once they have completed this task so you can activate their user profile and choose the functionality.
How to activate the user’s profile
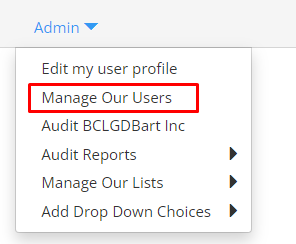
2. The Administrator will then need to activate, and assign user functionality. If you do not see the [Manage Our Users] on the Admin tab, have someone with this authority at your organization contact support@iwdr.org to request a specific user be given administrative credentials.
If you have the ability to see this, next you will need to go to the [Admin] tab on main menu, select [Manage Our Users].
3. If the new user has registered, their name will display on the list. Find the new user in the list that appears. Click the edit pencil for the user that needs to be activated, ![]() which is to the left of their username to edit their record.
which is to the left of their username to edit their record.
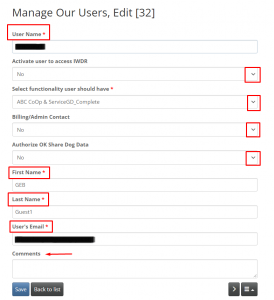
3.a. User Name… the user name should automatically be shown as what you entered to register it. If needing to change it for any reason, you can do that here.
3.b. Activate user to access IWDR… Select [Yes] from the drop down menu
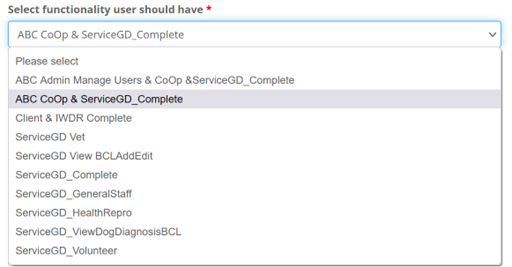
3.c. Select functionality user should have… select [ABC Coop & ServiceGD_Complete] as the functionality or another level of functionality that is desired. The list of possible functionalities depends on the type of entity (organization or breeder) and also membership in cooperatives. If you are unsure or have questions as to the differences in functionality, please contact support@iwdr.org.
3.d. Billing Admin Contact… Select [No] or [Yes] from the drop down menu, this should only be used for an admin user functionality. Select ‘Yes’ if this person is someone IWDR can contact concerning billing or general administrative questions or should receve the invoice for your organization’s IWDR subscription.
3.e. Authorize OK Share Dog Data… Select [No] or [Yes] if desired. Typically Breeding Managers have this functionality to share breeding / stud info. Select ‘Yes’ if this person is authorized to approve requests from other entities to share information on specific dog requests. If ‘Yes’, they will receive emails when requests are submitted through IWDR.
3.f. Next enter users FIRST & LAST Name in the fields indicated, and their User’s Email. DO NOT CREATE GENERIC USER ACCOUNTS. Unlimited users are allowed so everyone can have their own login and helps to track issues when they arise.
3.g. Users Email will already show as it was entered when registering.
3.h. Comments… enter any additional comments that might be needed.
3.i. Click [Save]
3.j. If more than one user being edited, you can click the ‘right’ arrow / second button from right at bottom. Or to reset, click the button in the bottom right (three lines and an up arrow), or you can also abort by clicking [Back to list] button at bottom, second from left.
** When a persons functionality access changes, for i.e. they leave the organization, you can end their user access by changing their [Activate user to access IWDR] status to [No].
4. Save your changes and notify the user that you have activated their account. Have an experienced user train the new user.
How to deactive a user:
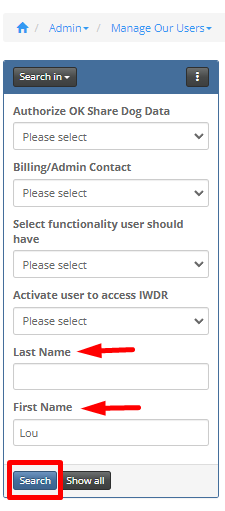
1. Go to the [Admin] tab and select [Manage Our Users] like when a user is added.
2. Your list of all users should appear on the screen. If it does not, go to the box on the left side of page and use any of the fields to search for the user you are looking for. The best method would be to put both the user’s Last and First name of the user. Click [Search] button.
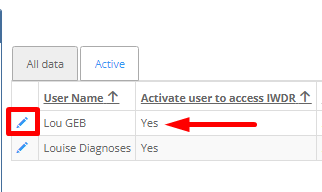
3. You will see in your list the name of your users (and if doing a search, any user that matches that description you entered). Once you have found the user you need, click the [edit] icon (the pencil). You can confirm/see they are active, where it says Yes.
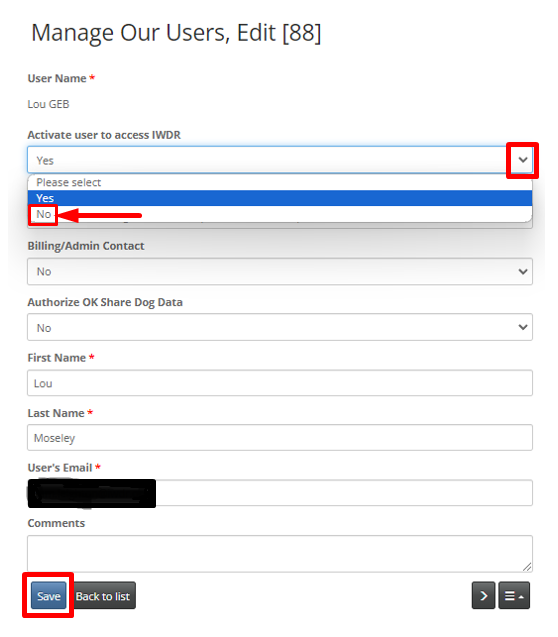
4. The next screen will show the users profile. In the first field, use the drop down menu and select [No].
Click [Save]. The user is now deactivated.
5. The user is unable to be deleted. This is because they have entered/edited data that will always be part of the IWDR data history.
If the user ever is needing to be re-activated, for instance after being gone from the organization on an extended leave, the same instructions apply, you would just then use the drop down menu and select [Yes] again and ensure you click save to make the change.